Sunday, January 30, 2011

Burda June maxi-dress Pt 1

I've been doing quite a bit of sewing in the evenings this week - or more precisely, tracing and making muslins, with mixed success - 3 skirts (one rejected for now, one iffy and one that cross my fingers may be nice), 1 dress (looking good so far) and a top (how quickly can I hide it in the bin?).  

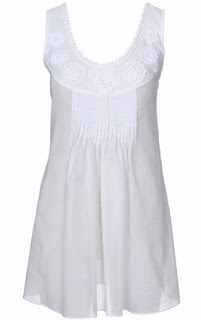
The dress is a maxi dress for my sister.  She's off to Hawaii for a holiday soon and this looks like the perfect attire for sipping mai tais by the beach. 
The pattern is from June 2010 Burda.   
The muslin is looking promising (the stripes are a bit distracting but the fit is nice).  She tried it on this morning and it looks good and just needs a centimetre taken in on the sides and the shoulder seams. 
It's dead easy to make.  The only issue is the front tucks.  When I traced out the pattern I marked in the tuck marks I saw - 10 of them, each of which ended up being about 1.5 cm wide to fit them to the yoke.  But looking at the photo (it is clearest in the pic of the top version) there are meant to be far more tucks (18?)and they are thinner.  Weird - I'll have to go back to the pattern and locate the missing lines. 
The fabric my sister picked out from the stash is this silk/cotton voile.  There isn't anything wrong with your eyes - it is a combination of being doubled over and the smudgy pattern.  It's very pretty in real life!
I've never worn a maxi dress although I love the look of them on other people.  I tried this muslin on myself and can see why they are so popular.  Wow, how comfortable and you feel so glamorous.  Maybe after finishing this one for my sister I'll try one for me.  It would certainly improve on my normal scruffy 'at home' wear.   This one from the same Burda is particularly nice. 

Sunday, January 23, 2011

November Manequim top 408

My first Manequim project!   When I first subscribed to Burda I didn't make anything from it for about 8 months so I'm not doing so badly here.
This is a very simple shape. A basic trapeze with a triangle added to the centre front and the bottom shaped accordingly and a couple of inches are hoiked up and sewn together at the top.
One of the things I like about working with foreign language pattern mags is how they challenge and develop your construction techniques. You just have to take your best stab at how the garment is constructed and let go of ideas of right and wrong. As you are guessing what the RTW actually looks like, it doesn't really matter.  Here, I experimented with ways to sew the hoiked up bit, none looked exactly like the photo but it is fine.
The first version is in a patterned crinkle poly - I was in Potter Textiles and spotted this remnant draped around a dressform, which they kindly sold to me for $5.  That's a nice cheap top!  The second version is in a cream hammered silk satin.

If mine looks a little different from the pattern pieces - the pattern has asymetrical sleeves, but I was planning on wearing this to work so made both sleeves the same.   Hopefully you can get an idea of the shape of the front when the pattern is folded along the centre.
The Manequim pattern sheets are a bit horrific - I'm not crazy about drawing on pattern sheets normally but a highlighter pen is merited with these.  Finding the outside lines aren't so bad, but finding the grainlines and any pattern markings can involve some squinting.  

Most Manequim patterns come in one size only, and this is size 46.   The Manequim, Vogue and Burda sizing charts are below for a comparison.  I managed to stack on a few kilos whilst on holiday and I'm not quite sure of my current size (I'm in denial).  Hopefully I'm on the downward slide now I'm separated from the fridge, but meanwhile size 46 seems to be equivalent to a Vogue size 18 - noooooo!  I can't have gone up 2 dress sizes!    I'm telling myself that this is just a roomy style!
The photos in the magazine are of RTW clothes so the patterns may not be EXACTLY the same.  The flower had me stumped.   This is the pattern piece.
And this is the photo.  Hmm...
After an internet search and stumbling upon Little Birdie Secrets I came up with something vaguely similar.  This is the end result. 
I used a different method for the cream version, although I'm going to revisit this as after looking at the photo of the top... hmmm not loving so much.  It looks a bit wedding-y or shiny doesn't it?   Do you think the roughness of the raw edged flower would be better?  
 
And the pants - I don't think I have ever owned so many trousers!  It's great but time to move onto skirts methinks.   The fabric for these is an olive cotton lycra brushed sateen that I got a few months ago from Fabric.com.
These are a morphed pattern.  I cut out Vogue 8456.
but wasn't keen on the wide legs so superimposed the bootleg from Vogue 9537 over the legs.  Goodness, I bought this pattern from the Lincraft that used to be in Perth CBD, how long ago was that?

Saturday, January 15, 2011

A couple more projects

Going back to work has certainly put a crimp in my sewing and internet-y activities, but I'm planning to remedy that this weekend.   Lots cut out and I'm raring to go!

I did get a couple more basics finished before going back to work. 

Okay, this is overkill but I made another of the October Burda tie neck blouses.  This is the last!  The pattern has now officially been retired.    The fabric is a black silk georgette (a remnant from Potter Textiles - bargain!).    I cut the tie wider and longer and this time only one edge of the tie was sewn to the neck, so the other side is free.    
The trousers are another pair of the skinny trousers from Burda 3/2010 (style 109B) - without the pockets this time.  The pockets are meant to be in the side seams but gape - much easier without!  The fabric is a stretch heavy cotton drill in tan - another one I'd had in the drawer for years and years and I'm delighted to have finally made into something. 
And finally, my first Manequim project.  Style 408 from November issue No. 616. I love it although there are a few 'issues' which I am going to try and fix up with a second version in a cream silk and I'll do a review for it when that is finished. 
Bye for now...


Thursday, January 6, 2011

Burda blouse 120 10/2010

No more sleep-ins and afternoon naps for me.  I've got through days 1 and 2 of the return to work - only a couple of decades more to go!  Urgghhhh....

On the far more enjoyable subject of sewing, I'm having an I-love-Burda Mag moment (um well, apart from December and January...).  I know I may be in limited company as I've noticed a few bloggers saying that it used to be much better.  I've only been subscribing for a couple of years so I'm not much of a judge but I like that it can be spot on with current styles, and sometimes ahead of them!  

Whilst flicking through the Pre-fall 3.1 Phillip Lim collection on Style.com - which is so nice it may be my winter sewing inspiration - I kept seeing Burda synchronicities.  
That neckline with the ring reminds me of this from June Burda. 
And:
A slightly less luscious version from December Burda?
As to what I've been sewing - 2 versions of another blouse from October Burda.  Model 120 described as a 'full cut peasant blouse with standing collar and wide French cuffs' - although mine are a little less full cut and don't have the french cuffs.
Is it weird making 2 of everything?  I'm trying to use my fabric stash.  I'm hoarding fabric like there is going to be some kind of fabric famine whilst complaining that I don't have anything to wear!   

The first version is in a crispy satin silk bought ooh 10 years ago - I'd given up thinking I would ever use it.  Yesssss!  Finally it has become something!
The second version is in a pale pink silk crepe de chine.
I'd never done a tab front like this before and it was a bit of a challenge understanding the Burda instructions.  It is fiddly. 

Finish the edges around the bib and the front before starting (not mentioned in the instructions).   The instructions have you gather the front (see below) then sew the inserts to the front.   The markings and seams have to be spot on or the front bands won't overlap precisely when finished.
Then you sew on the bands.
Then the left side tab is turned inside out and the tab sewn and then turned right side out. 
Finally the bands are catchstitched.  The last step involves sewing the tab to the front. 
The blouse was a bit baggy so I took 4cm off the centre back (so the back is 8cm narrower than the pattern).  The side seams were also taken in 3cm each, tapering up to nothing at the armhole.

All in all, it is a nice, comfortable top.  

Saturday, January 1, 2011

November Manequim No. 2

A feast of Manequim magazines is turning up at the moment - Manequim No. 616 arrived this week and it is the best yet.   
I have to confess I haven't made anything from these yet.   The ones I want to make involve some pattern grading to make them my size so they've been put aside for a tracing and grading mood. This edition, however, has quite a few that won't need grading up. 

So many great tops that don't look too complicated to make.    
This edition has the regular section recreating clothes worn by TV people.   
And another section with party clothes on one of the actresses, which includes this magnificent silver dress and the cover outfit. 
An inspired by nature section with some casual basics.
There is a really nice selection of larger sizes inspired by Queen Latifah.
A section of pretty party gear. 
And finally, the mix and match section which shows some of the ones I haven't shown (they have black stars next to them).